Best Punch Bowl Cake Recipes
You often perceive a work of art well beyond comprehension. You also consider much less possible yet to replicate to see a well-organized punch bowl cake. The very idea of the setting, the layering, the perfect combinations set in the perfectly right spots. All these mixing together at the right time in the right place in your mouth leave you wonder struck. Punch bowl cakes at that moment seem to us a dream that is too good to be true. No wonder we all get the urge to lick the plates after we’have done with a punch bowl cake.
1. What You Need for a Punch Bowl Cake with Chocolate Toppings
Don’t let others overwhelm you so easily. After all, you can prepare your punch bowl cake in a few attempts. Let’s discuss what you’ll be needing to start with. Since we’re not talking about baking simple cakes, this is what you clearly want to know how to make a punch bowl cake. We’ll start when the cake is half-done. That means when you have that 1-2 layers of cake and the 2 packages of puddings prepared, your 16-ounce container of toppings whipped and all set. And of course, the 20-ounce can be of cherry pie filling or two if you’re going for more.
One way to go about it would be to have a ready-to-eat pound cake from the market.You may slice it into cubes. Just to present a good example, we may discuss the pineapple punch bowl cake in this recipe. Moreover, mostly punch bowl cakes follow the same idea.
 Image Source: Flickr
You’ll be needing your flavor ingredient or the main specific ingredient for the punch bowl cake to go. That means your pineapples should be crushed. Also, your chocolate paste should be ready or whatever you are adding in your molten flavor layer. You should have crushed and fresh walnuts, flaked coconuts, pineapples and/or strawberries.
The Procedure:
The theory to go about when making a punch bowl cake is to think of it as a house. You want a blueprint of it, floor by floor. What in your view will we need to put in the bottom to keep the shape of the cake intact? And w about the taste that you would want to hit the top or bottom side of the mouth? A punch bowl cake is only as good as the timings of the different layers of taste exploding into your mouth. Be innovative and manage to put the cake cubes in the bottom. The trifle bowl sides should be filled if you don’t want anything wasted.
Now you know you need a layer of your taste-maker in to be ready to go. Crushed pineapples, for instance, are spread across to fill the big gaps. This is to save the paste that is going to be added next. Gently allow it to tell you how much goes where and accordingly, without haste, pour the layer of your pudding. Just after that, you should get that whipped cream you have and have it go with the pudding. This will give it a nice touch of delicate taste. This also helps in strengthening the foundation of your cake.
 Image Source: Goodfreephotos
The Final Steps towards accomplishment:
Now to add the pie fillings like say, cherry pie fillings in the case of the pineapple punch bowl cake. And there you have it, your first floor of the house or the foundation has been laid. Now if you’re going for the easy way, you can repeat the process. But if you’re challenging yourself to a harder cake, you can add a different layer on the foundation. According to the theory of laying, all required and appropriate ingredients and tastes must be in the right places.
2. What You Need for a Punch Bowl Cake with Strawberries on Top
Sometimes, I get a very strong urge to bake something at home for my family and it gives me immense pleasure when I accomplish my thought into reality. Last weekend, I managed to prepare a punch bowl cake with strawberry toppings for my family. It was enough for ten servings and everyone ate it with great relish, enjoying all its nutrients to an atom. I want to share with you all the recipe of this delicious dessert so that many families may enjoy this dessert the coming weekend.
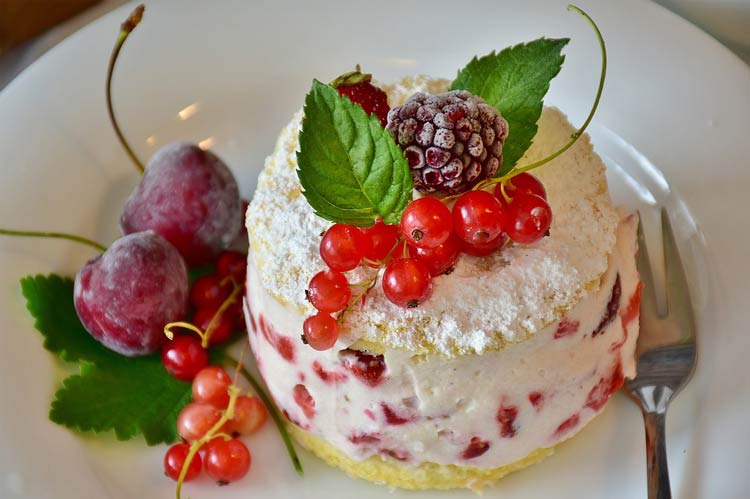 Image Source: Maxpixel
The Ingredients:
- 1/2 Cream Cheese Pound Cak e Recipe (halved)
- 1/4 cup orange juice
- 1 pint strawberries sliced
- 3 tbsp granulated sugar
- 1 tbsp lemon juice or lime juice
- 2 cream cheese blocks 16 ounces total
- 1 cup sifted powdered sugar
- 4 tsp strawberry preserves melted
- 1 1/2 cups whipped cream
The Methodology:
- Once you have prepared your cake and cooled it to the room temperature in a pan, cut it into the cubes and put it aside.
- Get your Strawberries sliced and in a large bowl add them along with granulated sugar and lemon or lime juice.
- Then toss this mixture well and leave it aside until they develop their natural juices in the mixture.
- Put together the cream cheese, powdered sugar and the strawberry preserves in a large bowl and, with the help of an electric mixture at a medium speed, beat the whole mixture well until it gets it gets smoothly blended.
- You may also add a food coloring if you wish so. Stir the desired color in a 1/2 cup of whipped cream. Then set it aside for a few minutes.
The Assembling:
Here you have to do a few more steps to get all the above mixtures well assembled into a mouth watering cake.
a. Take a large deep baking dish, put the cubes of the cake in it and add the orange juice by sprinkling it over the cubes.
b. Now spread a layer of the filling and next add the macerated strawberries to it.
c. Then comes the whipped cream layer on top of this base layer.
d. Repeat the same procedure till you reach the top of the baking dish.
e. At the end, you should top your dessert with a layer of whipped cream and then garnish it with the fresh strawberries. Finally, put your cake into the refrigerator till you serve it.
Conclusion:
Lastly, when you’re doing the toppings, make sure to not leave any place unchecked for missing flavor. And before you lose your control and eat it, please let it chill for at least 60 minutes. All this will mean a really perfect experience of the cake.
Featured Image Source: Wikimedia

